


- Publisher: Line6
- Product: Helix Native
- Version: 3.0 – V.R
- Formats: AAX, VST3, VST
- Requirements: Windows (64-bit)
Helix 3.0 includes new amps, cabs, effects, features, bug fixes, and other changes and improvements and is strongly recommended for all Helix and HX owners.
New Amps
Helix Floor, Helix Rack, Helix LT, Helix Native, HX Stomp
- US Princess, based on* the Fender® Princeton Reverb
- Das Benzin Mega, based on* the Mega channel of the Diezel VH4
- Das Benzin Lead, based on* the Lead channel of the Diezel VH4
New Cabs
Helix Floor, Helix Rack, Helix LT, Helix Native, HX Stomp
- 1×10 US Princess, based on* the Fender® Princeton Reverb cab
- 1×12 US Princess, based on* the Fender® Princeton Reverb with a 12″ Alnico Blue driver
New Effects
Helix Floor, Helix Rack, Helix LT, Helix Native, HX Effects, HX Stomp
- Distortion > Horizon Drive(Mono, Stereo), based on* the Horizon Devices Precision Drive. Includes an extra Gate Range parameter that, when set to “Extended,” drops the gate’s threshold down to -90dB
- Distortion > Swedish Chainsaw(Mono, Stereo), based on* the BOSS® HM-2 Heavy Metal Distortion (Made in Japan black label)
- Distortion > Pocket Fuzz (Mono, Stereo), inspired by* the Jordan Boss Tone fuzz
- Distortion > Bighorn Fuzz (Mono, Stereo), based on* the 1973 Electro-Harmonix® Ram’s Head Big Muff Pi
- Distortion > Ballistic Fuzz (Mono, Stereo), based on* the Euthymia ICBM fuzz
- Dynamics > Horizon Gate (Mono, Stereo), based on* the Horizon Devices Precision Drive’s gate circuit. Includes an extra Gate Range parameter that, when set to “Extended,” drops the gate’s threshold down to -90dB. Works best before an amp
- EQ > Acoustic Sim (Mono, Stereo), based on* the BOSS® AC-2 Acoustic Simulator. Includes an extra Shimmer parameter that imparts some motion to the harmonics, reminiscent of how a string’s vibration tends to affect the other strings. Can be used alone or in conjunction with an acoustic IR
- Modulation > Poly Detune (Mono), Line 6 Original. Great for those who avoid traditional chorus pedals
- Delay > Poly Sustain(Mono), Line 6 Original infinite sustain with a modulated poly pitch engine built in
- Assign Poly Sustain to a stomp footswitch. By default, Poly Sustain appears bypassed.
- First play the note or chord you wish to sustain, and then press the footswitch (on) to sustain it indefinitely. Keep playing while the note or chord loops. TIP: Some players may find it easier to change the footswitch mode to Momentary; that way, the note or chord sustains only while you hold the switch on, much like the sustain pedal on a piano.
- Press the switch again (off), and the sustained note or chord fades out.
- Interval—Sets the pitch of the sustained note or chord. TIP: This parameter is especially cool for creating massive drones to play over
- Attack—Sets the speed at which the sustained note or chord fades in
- Decay—Sets the speed at which the sustained note or chord fades out after bypassing the effect
- Mod Freq—Sets the speed of the built-in modulation
- Mod Depth—Sets the depth of the built-in modulation
- FX Level—Sets the level of the sustained signal
- RandDpth—Higher values increase the randomization of the section of audio being sustained, resulting in a more natural, but less predictable drone
- RandSpeed—Controls how fast the randomization wanders
- Level—Controls the overall output level of the block
- Delay > Glitch Delay (Mono, Stereo), Line 6 Original performance delay that lets you freely manipulate the repeats’ behavior in real-time
- Time—Sets the delay time; press the knob to toggle between ms/sec and note values
- Delay Div—Divides the delay time into smaller increments
- Mix—Controls the wet/dry mix of the delay. When set to 0%, no delay is heard; when set to 100%, no dry signal is heard
- Feedback—Controls the overall number of repeats heard for the entire sequence
- SliceFdbk—Controls the number of repeats heard for individual slices. At higher values, you could call this “Super Chaotic Feedback”
- Shuffle—Determines the likelihood of repeats shuffling/reordering
- Octaves—Determines the likelihood of repeats playing back an octave higher or lower
- Reverse—Determines the likelihood of repeats playing backward
- Seq Drift—Determines the likelihood of the entire sequence changing every time it loops around. When set to 0%, the same sequence loops forever. TIP: Assign this parameter to a footswitch set to toggle between a higher number and 0%. If you hear a random sequence you want to maintain, press the switch to set Seq Drift to 0%, and it’ll repeat that way indefinitely
- Smoothing—Higher values apply smoothing between slices and can give a synth-pad type quality, lower values maintain transients. Or set it just high enough to avoid pops and clicks
- Trails—When on, delay repeats continue to ring out after the block is bypassed
- Pitch/Synth > Poly Pitch(Mono), Line 6 Original
- NOTE: Polyphonic pitch engines are designed for shifting complex chords with minimal artifacts at the expense of latency (and our algorithms have lower latency than leading standalone poly pitch pedals). If you’re looking to pitch individual notes (such as in a solo), monophonic pitch-shifting is often preferred. See the Tracking parameter below for more information
- IMPORTANT! 3.0’s new poly models are extremely DSP-intensive. Some effects can eat up roughly a quarter of all available DSP on a Helix Floor, Rack, or LT or half (!!!) of all available DSP on HX Stomp or HX Effects. You also can’t run more than one on the same path/DSP (unless you’re running Helix Native with Hardware Compatibility Mode turned off). Don’t say we didn’t warn you…
- Interval—Sets the pitch of the effect in semitones
- Cents—Sets the pitch of the effect in cents
- ShiftTime—Determines how long it takes for the signal to ramp up or down to the set pitch when the block is enabled. Press the knob to toggle between ms/Sec and note/beat values. TIP: Want to hit the switch and have Poly Pitch dive bomb and land exactly one bar later? Press the knob to select note values and set ShiftTime to “1/1”
- ShiftCurve—Determines the trajectory curve of the pitch shift over time. StartSlow values are concave (slower changes to start, speeding up toward the end); StartFast values are convex (the opposite). At the knob’s extremes (Start Slow 5 and Start Fast 5), the pitch will actually overshoot a little before settling on the target pitch. The default is “Linear”
- ReturnTime—Determines how long it takes for the signal to return to normal pitch when the block is bypassed. Press the knob to toggle between ms/Sec and note/beat values
- ReturnCurv—Determines the trajectory curve when returning to the original pitch. StartSlow values are concave (slower changes to start, speeding up toward the end); StartFast values are convex (the opposite). At the knob’s extremes (Start Slow 5 and Start Fast 5), the pitch will actually overshoot a little before settling on the original pitch. The default is “Linear”
- Tracking—Determines how the poly pitch engine reacts to your playing. Leave this set to “X Stable” (the default, with the fewest artifacts when pitch shifting complex chords) and only select a different setting if you experience too much latency when playing fast lead lines
- Auto EQ—Determines how much compensation EQ is applied to the shifted signal. If the effected signal sounds too harsh when pitched up (or dull when pitched down), adjust this setting to taste. The higher the value, the more EQ is applied at the shift end points; when set to 0.0, no compensation EQ is applied
- Mix—Controls the wet/dry mix of the pitch-shift
- Level—Controls the overall output level of the block
- Pitch/Synth > Poly Wham(Mono), Line 6 Original. Automatically assigned to EXP 1 and the toe switch toggles it on and off. See Poly Pitch notes above for additional information
- Pitch/Synth > Poly Capo (Mono), Line 6 Original. A Simpler version of Poly Pitch when you just want to transpose your playing. See Poly Pitch notes above for additional information
- Pitch/Synth > 12 String(Mono), Line 6 Original 12-string guitar emulation
- Volume/Pan > Stereo Imager (Stereo), Line 6 Original. Used to increase the apparent stereo width of your signal when connecting Helix to two amps or a stereo playback system; just make sure there aren’t any mono blocks after it!
- Looper > Shuffling Looper (Mono, Stereo), Line 6 Original. Part looper, part sampler, part inspiration generator, part performance instrument, the Shuffling Looper intelligently chops up your playing and gives you real-time control over reordering, octave shifting, reversing, and repeating. It’s all immense fun (even on vocals, drums, and percussion), but you’ll want to familiarize yourself with its controls. IMPORTANT: The Shuffling Looper does not currently respond to Command Center > HX Commands or per-function MIDI commands
- Add the Shuffling Looper to a preset and assign it to a footswitch.
- Turn Knob 1 (Slices) to set the number of slices your loop will be chopped into. 8 slices is the default.
- Press the switch to begin recording. The LED lights red, indicating the loop is recording.
- At the end of your loop, press the switch. The LED lights green, and the sliced loop sequence immediately plays.
- During playback, adjust the following knobs (or assign them to controllers, like expression pedals or snapshots):
- Slices—Changes the number of slices your loop will be chopped into
- SeqLength—Determines the number of slices in the sequence. This can be changed even after recording a loop
- Shuffle—Determines the likelihood of slices shuffling/reordering. At 0%, the slices never shuffle; at 100%, they’re constantly reshuffling
- Octave—Determines the likelihood of slices playing back an octave higher or lower
- Reverse—Determines the likelihood of slices playing backward
- Repeat—Determines the likelihood of slices repeating
- Smoothing—Higher values apply smoothing between slices and can give a synth-pad type quality, lower values maintain transients. Or set it just high enough to avoid pops and clicks
- Seq Drift—Determines the likelihood of the entire slice sequence changing every time it loops around. When set to 0.0, the same sequence repeats forever; when set to 10.0, the sequence changes completely every time it loops TIP: Assign this parameter to a footswitch set to toggle between a higher number and 0%. If you hear a random sequence you want to maintain, press the switch to set Seq Drift to 0%, and it’ll repeat that way indefinitely
- Playback—Sets the looper’s playback level
- Low Cut—Applies a low cut (or high pass) filter to the loop, letting you remove the looper signal below a certain frequency
- High Cut—Applies a high cut (or low pass) filter to the loop, letting you remove the looper signal above a certain frequency
- Want to change it up? While the loop is playing, press the switch to randomize its slice sequence.
- Quickly double-press the switch. Playback/recording stops, and the LED lights white, indicating a loop is in memory. Press again to restart.
- While the loop is playing or stopped, press and hold the switch. The recording is deleted, and the LED lights dim white.
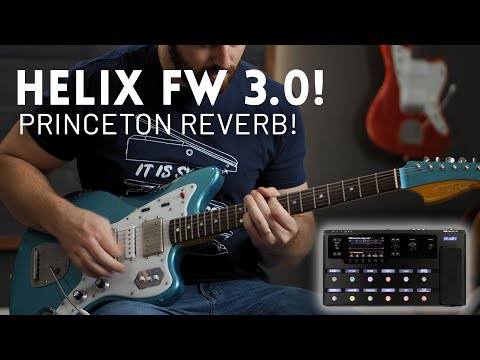
Helix Native v3.0 New Features
True Preset Spillover
Helix Floor, Helix Rack/Control, Helix LT only
Despite what some might have you believe, the only digital multieffects units with true preset spillover were the DigiTech GSP1101, 2112, and 2120, and they accomplished this by dedicating a second identical DSP to spillover and only spillover. (Basically, to hear two dynamically allocated presets with absolutely zero gap—not some global reverb or delay smeared to cover the gap—you need enough DSP to run both of them simultaneously.) So… if you’re willing to sacrifice half your DSP—that is, COMPLETELY DISABLE PATH 2—you too can have true preset spillover. IMPORTANT! Unfortunately, Looper recording or playback will not currently spill over from one preset to another. Also, note that there may be a slight hiccup when switching between two presets with different impedance values for the Guitar Input.
- In the Global Settings > Preferences menu, set Preset Spillover to “On.” (SHORTCUT: Hold ACTION and press HOME.) A dialog appears, reading “Remove Path 2 to enable preset spillover?”
- Press Knob 6 (OK).
- Press HOME. Path 2 has disappeared! You may now switch presets to your heart’s delight with true spillover, but note that if Preset A is still spilling over into Preset B (say one of its delay’s feedback is making it self-oscillate), switching to Preset C will abruptly cut off Preset A.
- To return to normal operation with two paths, turn Preset Spillover back to “Off.” (SHORTCUT: Hold ACTION and press HOME again.) A dialog appears, reading “The preset must be reloaded. All unsaved changes will be lost!” So if you’ve made changes to the preset, be sure to save it before turning Spillover off.
- Press Knob 6 (OK).
But but but… I don’t wanna lose Path 2 for spillover!
Then keep using snapshots.
Favorites
Helix Floor, Helix Rack/Control, Helix LT, Helix Native, HX Effects, HX Stomp
If you’ve dialed in an amp or effects block exactly the way you like it, you can now save its settings as a favorite so it can be added very quickly, complete with bypass state and footswitch assignment. (Favorites in HX Effects do not recall footswitch assignment.) Favorites appear in a new “Favorites” category and can be renamed, reordered, and cleared. From HX Edit, you can use the Export and Import Favorites to create an endless collection of them on your hard drive, and even share them with friends and across devices (where supported). TIP: If you don’t want a favorite to be recalled with its footswitch assignment, save the block as a favorite without assigning a footswitch.”
- Choose one of your favorite amps or effects and tweak it exactly how you like it, with or without footswitch assignment. (Favorites in HX Effects do not recall footswitch assignment.)
- Press ACTION and then press Add to Favorites. The Favorites list appears.
- If you wish to replace an existing favorite (you get 128 total), select it and press Replace Favorite. If you wish to add a new favorite, select the location where you want to place it and press Add New Favorite.
- OPTIONAL: While the Favorites list is open, press ACTION.
- To reorder the selected favorite up or down the list, turn Reorder Favorite (on HX Effects, press Reorder Up or Reorder Down)
- To rename the selected favorite, press Rename Favorite
- To clear the selected favorite, press Clear Favorite
- To clear all favorites, press Clear All Favorites. A dialog appears. Press OK to confirm.
All right, so what?
Here’s what:
- At any time, select an empty block and turn the joystick (Big Knob on HX Effects or Lower Knob on HX Stomp). All your perfectly-tweaked favorite amps and effects instantly appear, without having to open the model list at all. If you typically keep effect types on the same stomp footswitches, you could conceivably create a brand new preset with all of your favorite stuff—including all footswitch assignments—in less than 10 seconds. Creating tones has never been faster or easier. TIP: If you keep one or more external pedals connected to Helix’s FX Loops, add the FX Loop blocks as favorites and then rename them after the real thing.
Wait. Did you really name the 3.0 update after the 2004 romantic comedy starring Ben Stiller and Jennifer Aniston that has a dismal rating of 27% on Rotten Tomatoes?
Huh. I guess it sounds dumb when you put it that way.
User Model Defaults
Helix Floor, Helix Rack/Control, Helix LT, Helix Native, HX Effects, HX Stomp
3.0 lets you save any amp, cab, or effect block’s settings as default, so every time you call that model up, it sounds exactly the way you want it. Or, if you want to revert it to factory default, you can do that too. Editing/saving a User Default does not affect any existing instances of the model currently in use in your presets.
- Choose any model and tweak it exactly how you like it.
- Press ACTION and then User Default. From Helix Native or HX Edit, right-click (Mac: control-click) the block icon and select “User Default.”
Global Settings > Preferences > Auto Impedance
Helix Floor, Helix Rack/Control, Helix LT, HX Stomp
A new Global Settings > Preference parameter determines how the Guitar In’s impedance circuit behaves when Input > In-Z is set to “Auto.” When set to “First Block” (the default, and how Helix has worked since the beginning), the impedance circuit reflects the impedance of the first block on Path 1A, regardless of whether it’s enabled or bypassed. When set to “First Enabled,” the impedance circuit reflects the impedance of the first enabled block on Path 1A. Called “Auto Impedance” because “Sorry-this-took-so-long-we-love-you-Tito83” wouldn’t fit.
Min/Max Value Indicators
Helix Floor, Helix Rack/Control, Helix LT, HX Stomp [Feature already in HX Effects]
Parameters assigned to controllers or snapshots now display small white Min Value (below) and Max Value (above) indicators above and below the value bar. You can now see the range of continuous controllers from the Home screen.
8 Blocks in HX Stomp
HX Stomp’s simultaneous block count has been increased from six to eight.
IMPORTANT! Although HX Stomp now has two additional block locations, this doesn’t mean it magically has more DSP horsepower to accommodate those blocks. Don’t be surprised if you’re not able to fill all eight blocks with exactly what you want, especially considering the new polyphonic pitch models take up a lot more DSP. We’ve taken note of those who’ve bemoaned HX Stomp’s 6 block limit, and if the same person now complains about running out of DSP with 8 blocks, we’re sending hooligans to their home to administer an atomic wedgie.
NOTE: It shouldn’t come as any surprise, but any presets you make in 3.0 will not be compatible with 2.92 or earlier firmware.
Command Center in HX Stomp
HX Stomp [Feature already in Helix Floor, Helix Rack/Control, Helix LT, and HX Effects]
Why would people expect a stompbox with only three footswitches to also act as a master MIDI controller? Yeah, we don’t know either, but enough of you asked for it, and it wasn’t exceedingly difficult to add.
- Press <PAGE and PAGE> together to open the Menu and then press Knob 3 (Command Center).
- Turn the Upper Knob to select the command source (Instant 1-6, Footswitch 1-5, or EXP 1-2).
- Turn Knob 1 (Command) to select the type of command you wish to transmit. For information on the types of commands HX Stomp transmits, see the HX Stomp 3.0 Owner’s Manual.
Wait, does this mean I can use HX Stomp as both an audio interface AND a remote control for YouTube lesson videos by sending QWERTY hotkeys?
Yes.
Tuner in Helix Native
Helix Native now has the same needle and strobe tuner from Helix.
- Click the tuner icon.
- From the Type pull-down menu, choose the tuner type: Coarse, Fine, or Strobe.
Gain Reduction Meters in Helix Native
The following block types display a gain reduction meter in the inspector when selected:
- Dynamics > Compressor
- Dynamics > Gate
Artist Presets
IMPORTANT! Because we never want to overwrite your own presets, upgrading to 3.0 does NOT automatically make these presets visible; there are two methods to restore them:
METHOD ONE: Resetting Factory Presets
WARNING! Restoring factory presets will completely overwrite your own, so make sure they’re backed up first!
- Make sure you’ve backed up your presets and turn off Helix/HX.
- Perform the following procedure:
- Helix Floor/LT: While holding footswitches 7 and 8 (two leftmost switches on the bottom row), turn on Helix Floor/LT. Wait for “Will restore stock Presets and Setlsts…” to appear and let go
- Helix Rack/Control: While holding knobs 3 and 4 (two middle knobs below the screen), turn on Helix Rack. Wait for “Will restore stock Presets and Setlsts…” to appear and let go
- Helix Native: Click the gear icon in the lower left corner, select the Presets/IRs tab, and click “Restore Factory Setlists”
- HX Effects: While holding footswitches 5 and 6 (two middle switches on the bottom row), turn on HX Effects. Wait for “Will reset Presets…” to appear and let go
- HX Stomp: While holding footswitches 1 and 2, turn on HX Effects. Wait for “Will reset Presets…” to appear and let go
METHOD TWO: Manually Loading 3.0 Factory Setlists via HX Edit
WARNING HX Effects/Stomp users! Loading a factory setlist file will completely overwrite your own, so make sure everything’s backed up first!
WARNING Helix Floor/Rack/LT/Native users! Loading a factory setlist file will completely overwrite the current setlist, so make sure it’s backed up first! We strongly recommend you choose an empty (or unwanted) setlist to overwrite.
- Click here and download the setlist file(s) for your Helix or HX product.
- Connect Helix/HX to your computer and launch HX Edit 3.0 (or higher).
- If you have Helix Floor, Rack, LT, or Native, select the Presets tab and click the Setlists pull down to select the setlist you wish to overwrite (see image below). HX Effects and HX Stomp do not have multiple setlist locations, so you can skip this step.
- Drag the .hls setlist file you downloaded in Step 1 onto the Preset List.
Helix 3.0 includes factory presets created by the following artists:
Helix Floor, Helix Rack/Control, Helix LT, Helix Native [FACTORY 1 setlist]
- 13B-14C—Fish (Christina Aguilera)
- 14D—Jeff Waters (Annihilator)
- 15A, 15B—Richie Castellano (Blue Öyster Cult)
- 15C—Robbie Calvo
- 15D—Ryan “Fluff” Bruce (Dragged Under)
- 16A-16D—Felix Martin
- 17A—Mario Quintaro (Spotlights)
- 17B, 17C—Bumblefoot (Sons of Apollo)
- 17D, 18A—Billy Sheehan (Sons of Apollo, Winery Dogs)
- 18B—Andy Abad (Jennifer Lopez)
- 18C-19B—Misha Mansoor (Periphery)
- 19C—Duke Erikson (Garbage)
- 19D—Steve Marker (Garbage)
- 20A—Eric Avery (Garbage)
- 20B—Bill Kelliher (Mastodon)
- 20C—John Browne (Monuments)
- 20D—Olly Steele (Monuments)
- 21A—Jon Button (The Who)
- 21B—Trev Lukather (Levara)
- 21C—Steve Howe (Yes)
- 21D—Dustin Kensrue (Thrice)
- 22A—Pete Thorn
- 22B—Rhett Shull
- 22C—Jade Puget (A.F.I.)
- 22D, 23A—Jeff Schroeder (The Smashing Pumpkins)
- 23B—Graham Coxon (Blur)
- 23C, 23D—Chris Buck
- 24A—Lewis Allen (Sam Smith)
- 24B-25A—Rabea Massaad
- 25B—Soren Andersen
- 25C—Devin Townsend
- 25D, 26A—Nathan Navarro
- 26B-26D—Vernon Reid
- 27B—Philip Bynoe
- 27C—Markus Reuter
HX Effects
- 12A-12D—Julien Baker
- 13A—Sarah “Noveller” Lipstate
- 13B, 13C—Steve Stevens
Other Changes and Improvements
- On HX Stomp, Global Settings > Footswitches > Stomp Select now has an “Off” value. When set this way, neither touching nor pressing will change which block is in focus [value is already in Helix Floor, Rack, and LT]
- Pitch/Synth > 4 OSC Generator OscFreq parameters now display single Hz resolution between 100 and 1000 Hz
- HX Edit now lets you restore individual setlists from a backup
- In HX Edit, Favorites and User Model Defaults can now be restored from a backup, independent of setlists, presets, IRs, and Global Settings
- Gain reduction meters now also appear for the Input block’s noise gate [Helix Floor, Rack, and LT only]
- Gain reduction meters and signal present indicators are now more responsive
- Parameter knob ballistics have been improved
- Parameter slider handles are thinner to accommodate new min/max value indicators
- Press-turning a knob to assign Snapshot control now requires a bit more turning to minimize accidental assignments
- New splash screens for Helix Floor/Rack/LT and HX Stomp
Bug Fixes
- When synced to external MIDI clock or retriggering via TAP, certain models with tremolo circuits’ LFO set to square wave would invert the waveform–FIXED
- If Helix had been left powered on for 24 hours or longer with the same preset active (What? Why?), its reverb blocks could become disabled until selecting another preset—FIXED
- Many other minor fixes and improvements
Known Issues
- Distortion > Vermin Dist’s resonant filter was mapped incorrectly, and is especially apparent at higher gain settings. This will be fixed in 3.10
- In the Poly Pitch models, very fast playing may exhibit some minor onset smearing. Additional improvements to the poly pitch engine are forthcoming
- In certain cases, the Delay > Glitch Delay can exhibit minor pops and clicks when placed on Path 2, regardless of where its Smoothing parameter is set (that is, not the good type of glitchiness)
- The Shuffling Looper does not currently respond to Command Center > HX Commands or per-function MIDI commands
- Variax Model min and max sliders do not automatically update when a Variax is connected
- After importing a .WAV file into the current ‘Empty’ slot of an Impulse Response block, all audio output can stop
- When Tuner View is active while Spillover is engaged, changing presets can sometimes cause audio output to stop
- Clearing a Split block on Path 2 does not automatically remove its bypass assignment
